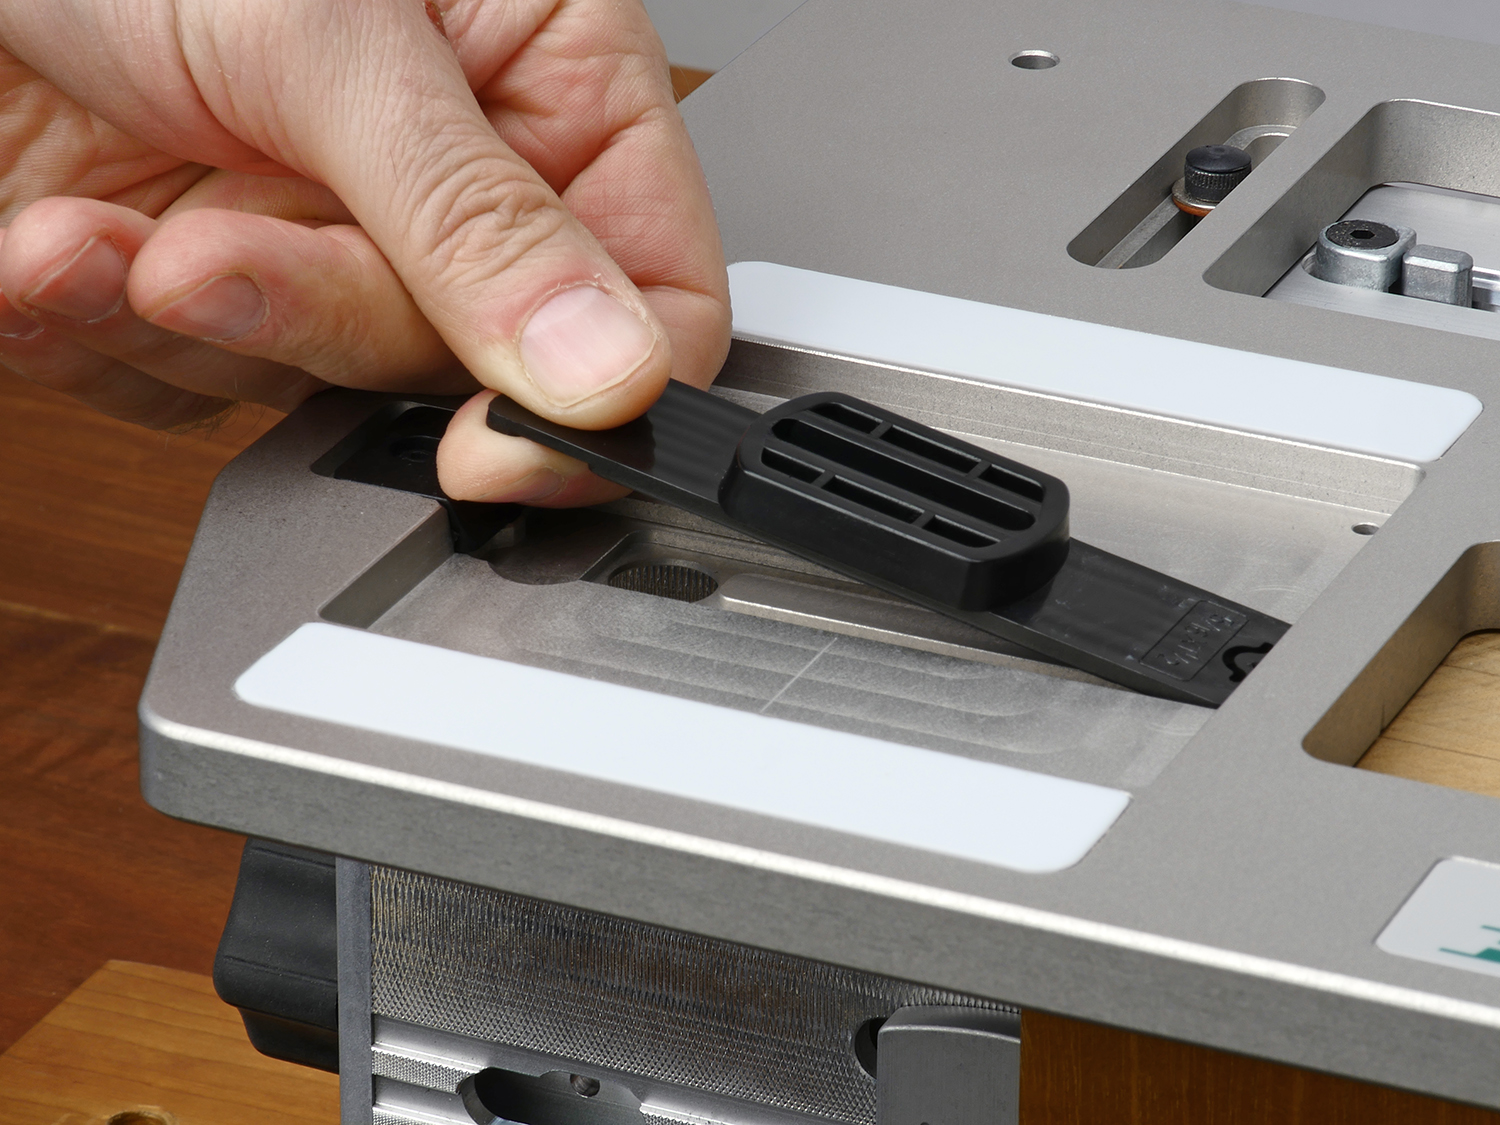
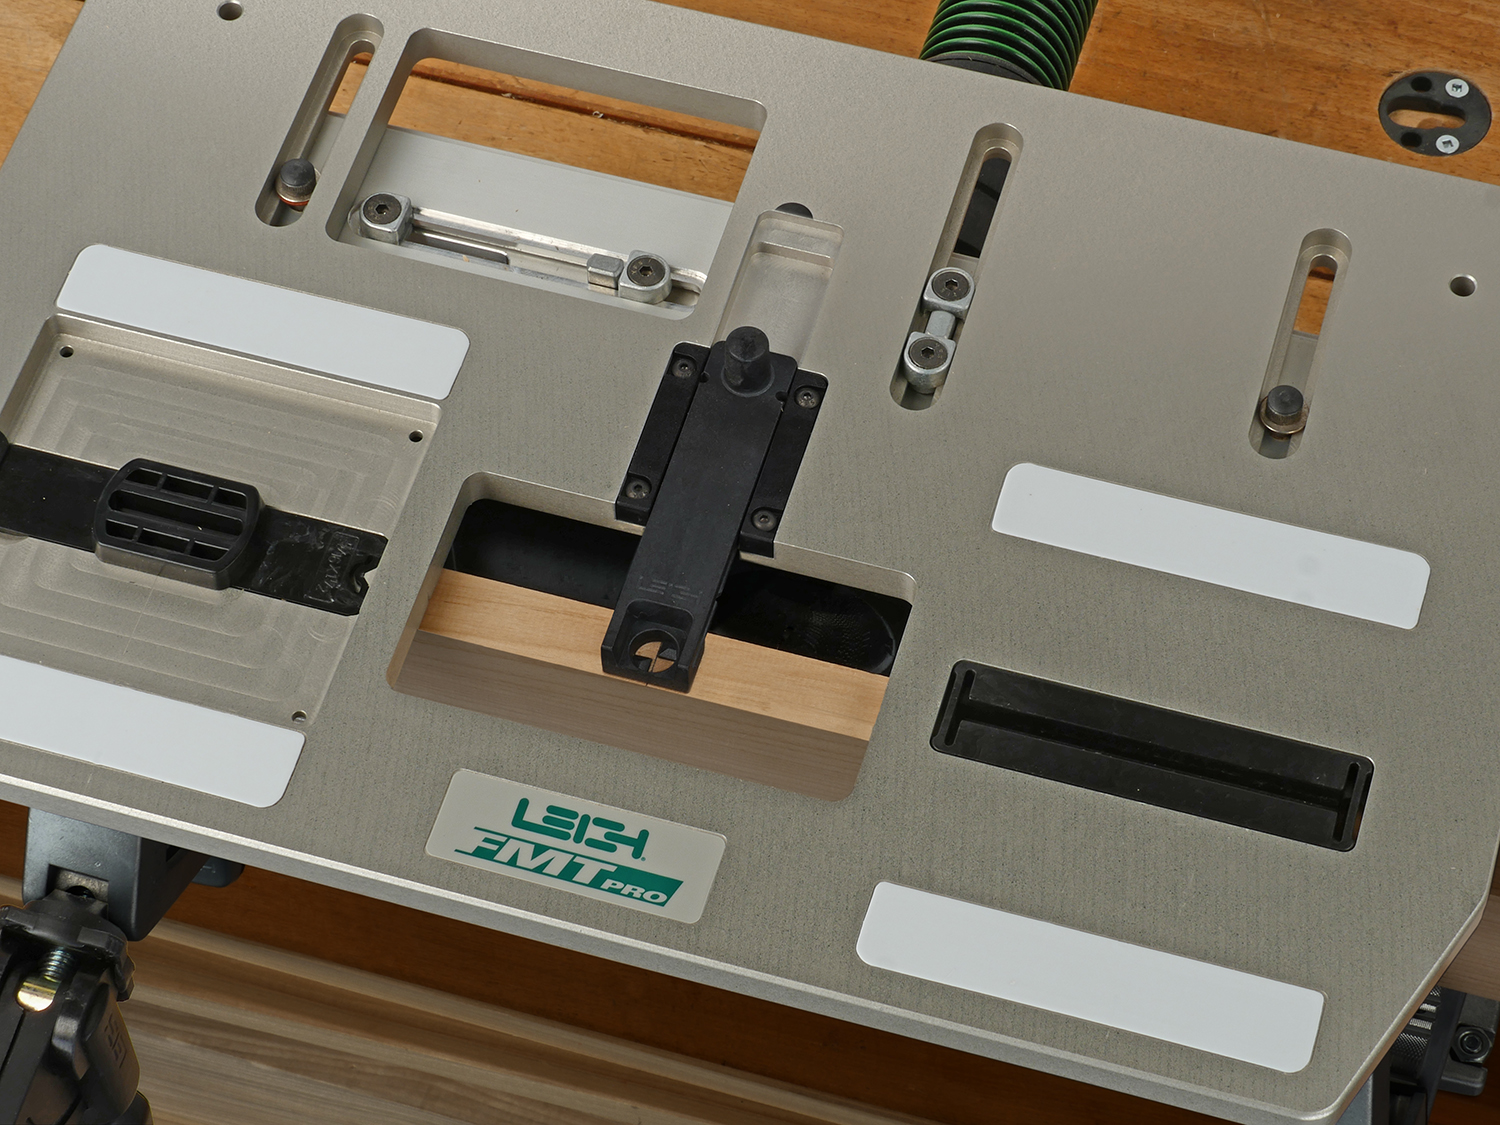
1 Select the joint guide and matching bit for the desired mortise and tenon size. Snap the guide into the table's guide recess.
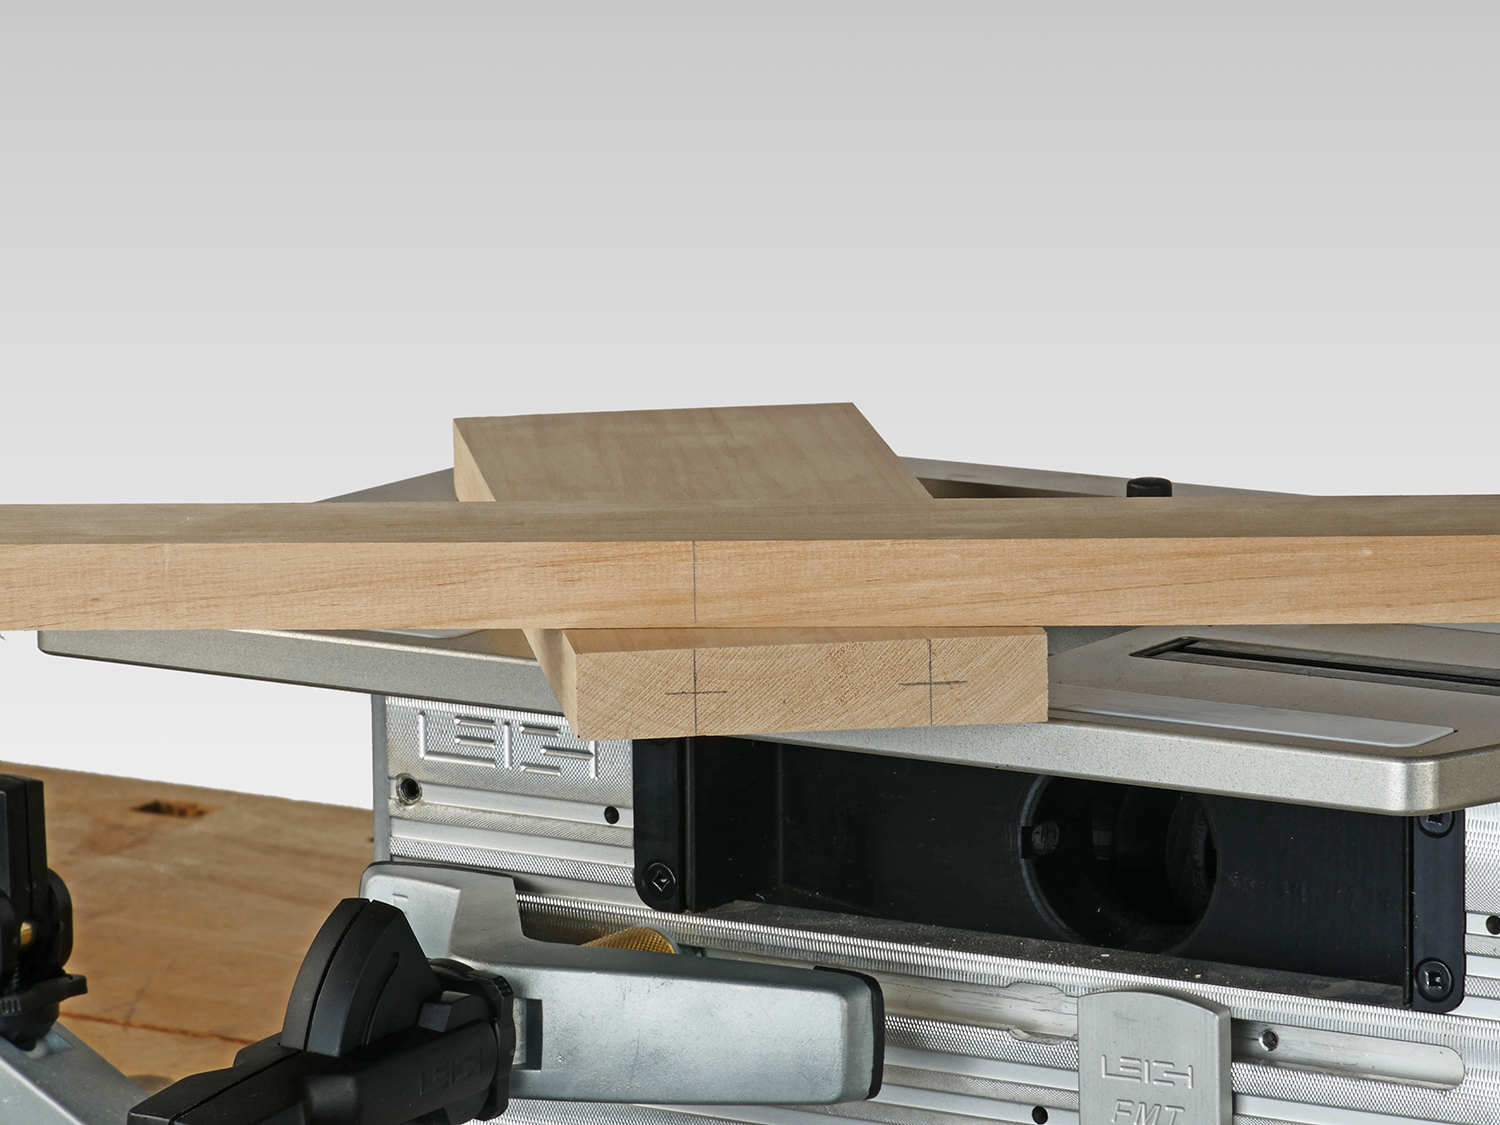
2 Mark the two tenons and mortise position to suit your layout.
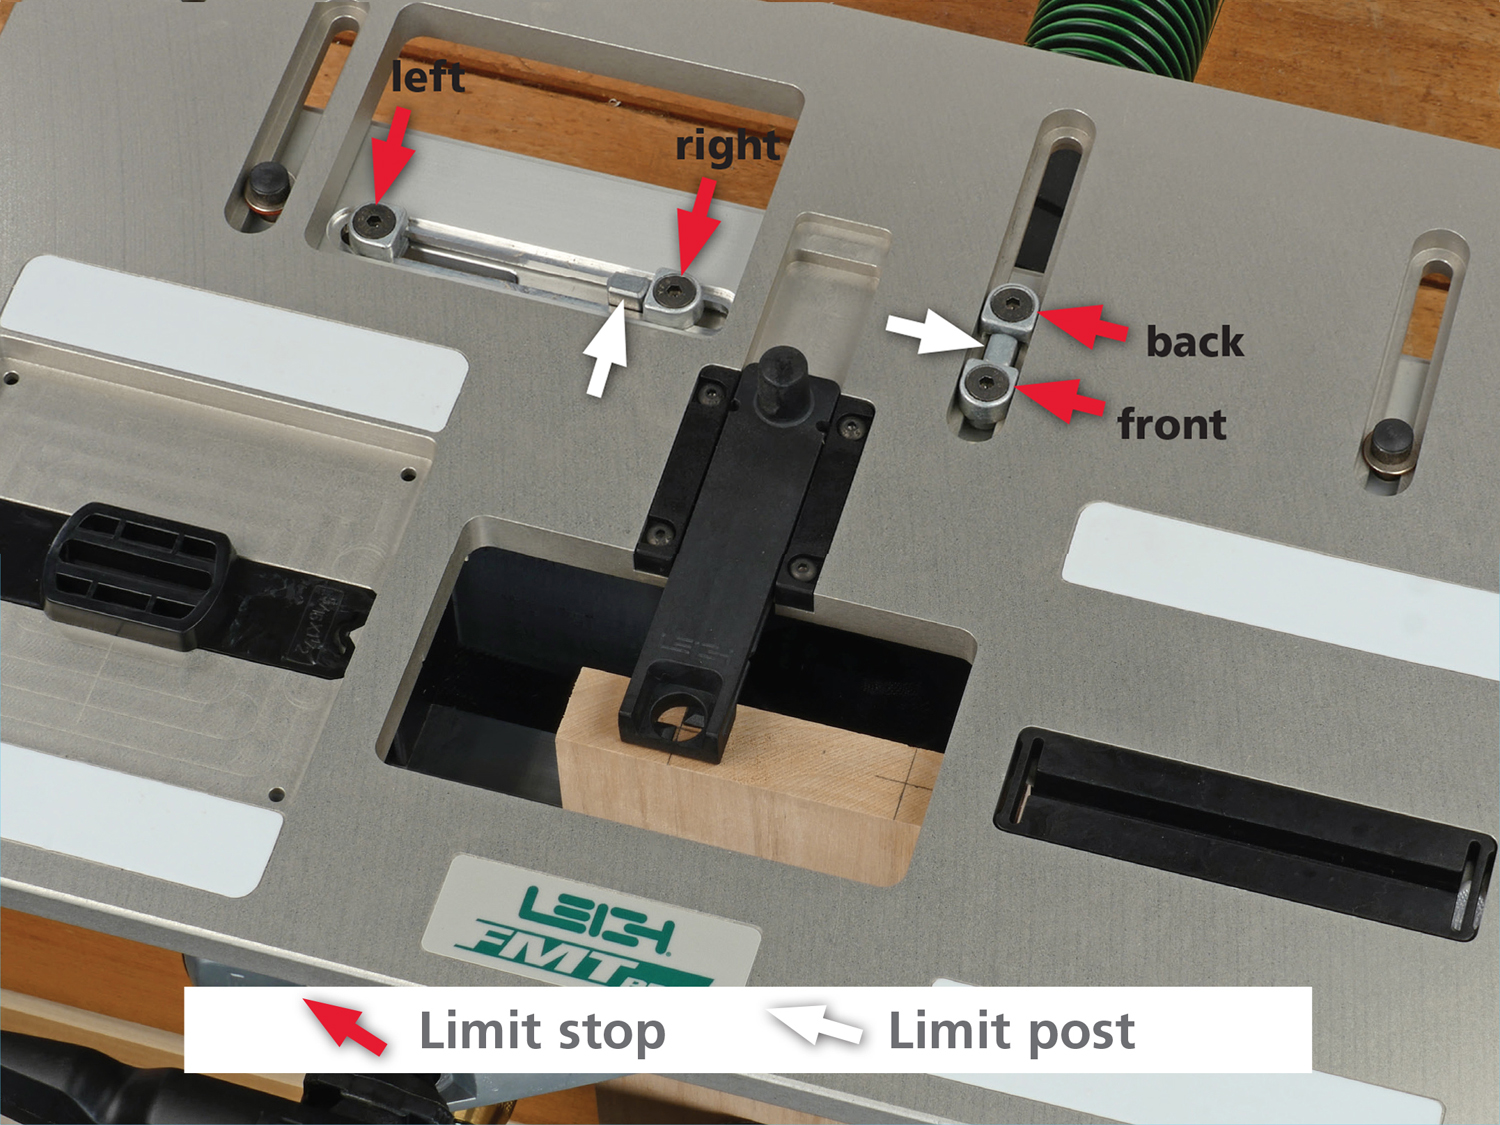
3 Clamp your tenon workpiece onto the clamp plate, against the side stop fence. Move the table to sight the left tenon position, and lock the front, back and right limit stops against the limit posts. Then sight the right tenon, and lock the left limit stop. This sets up the table for easy and accurate positioning, as you rout each successive workpiece.
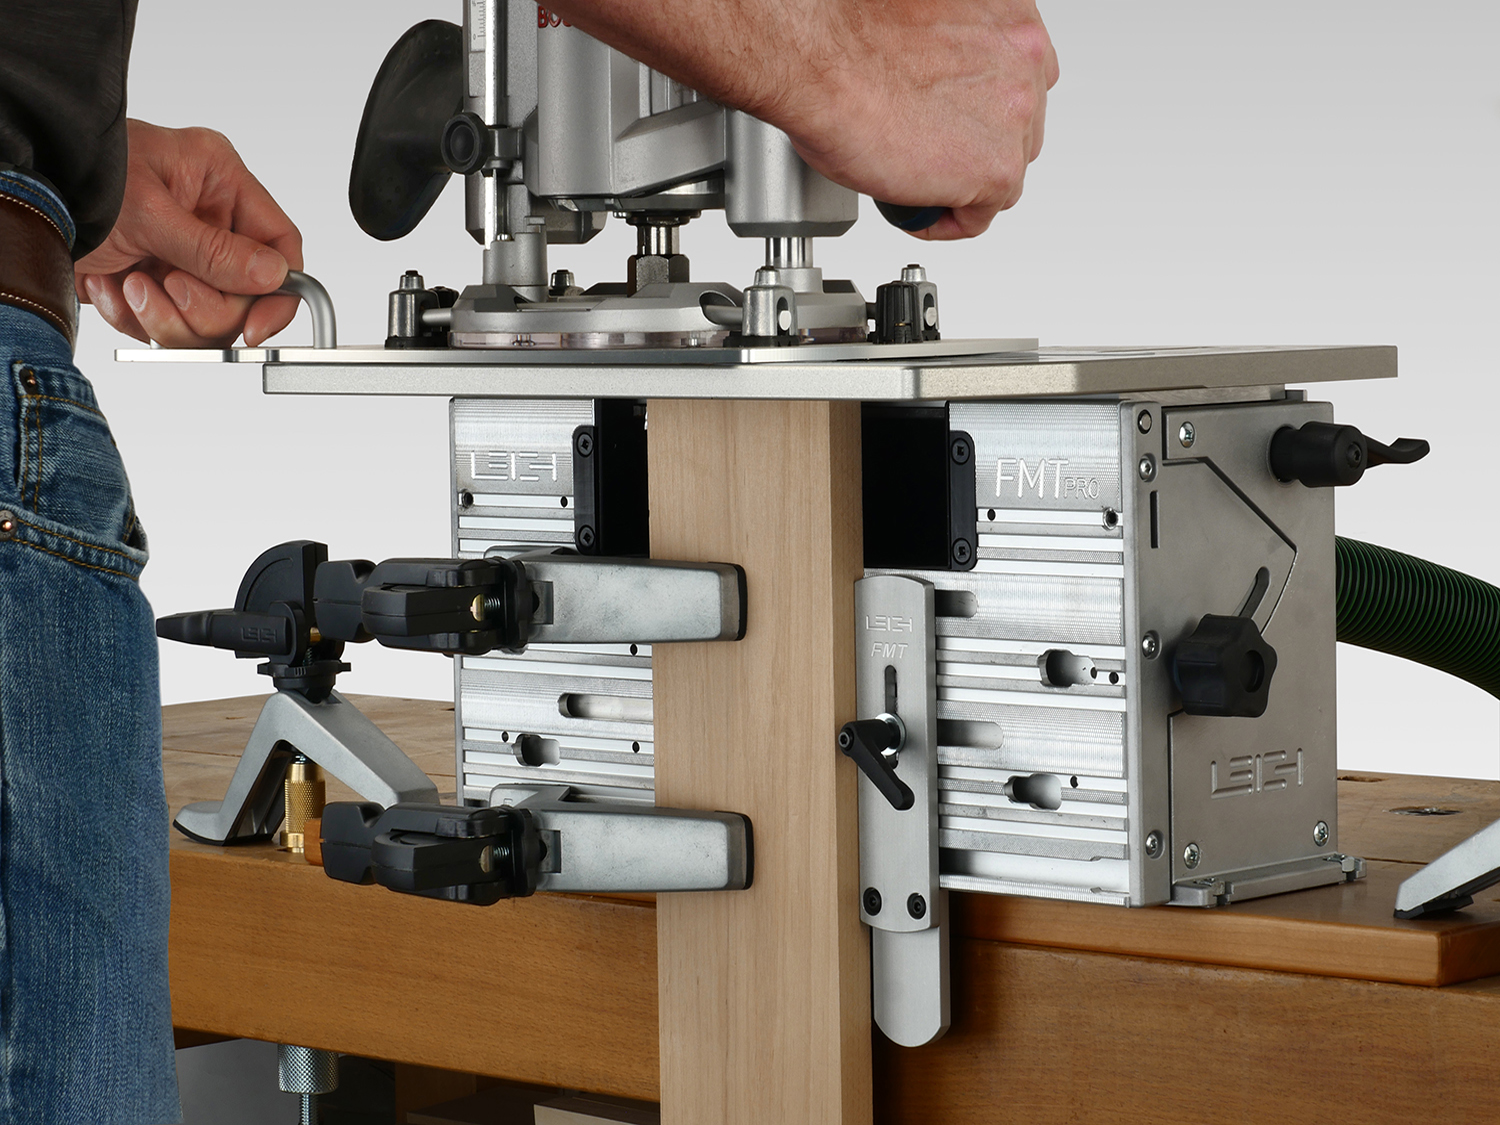
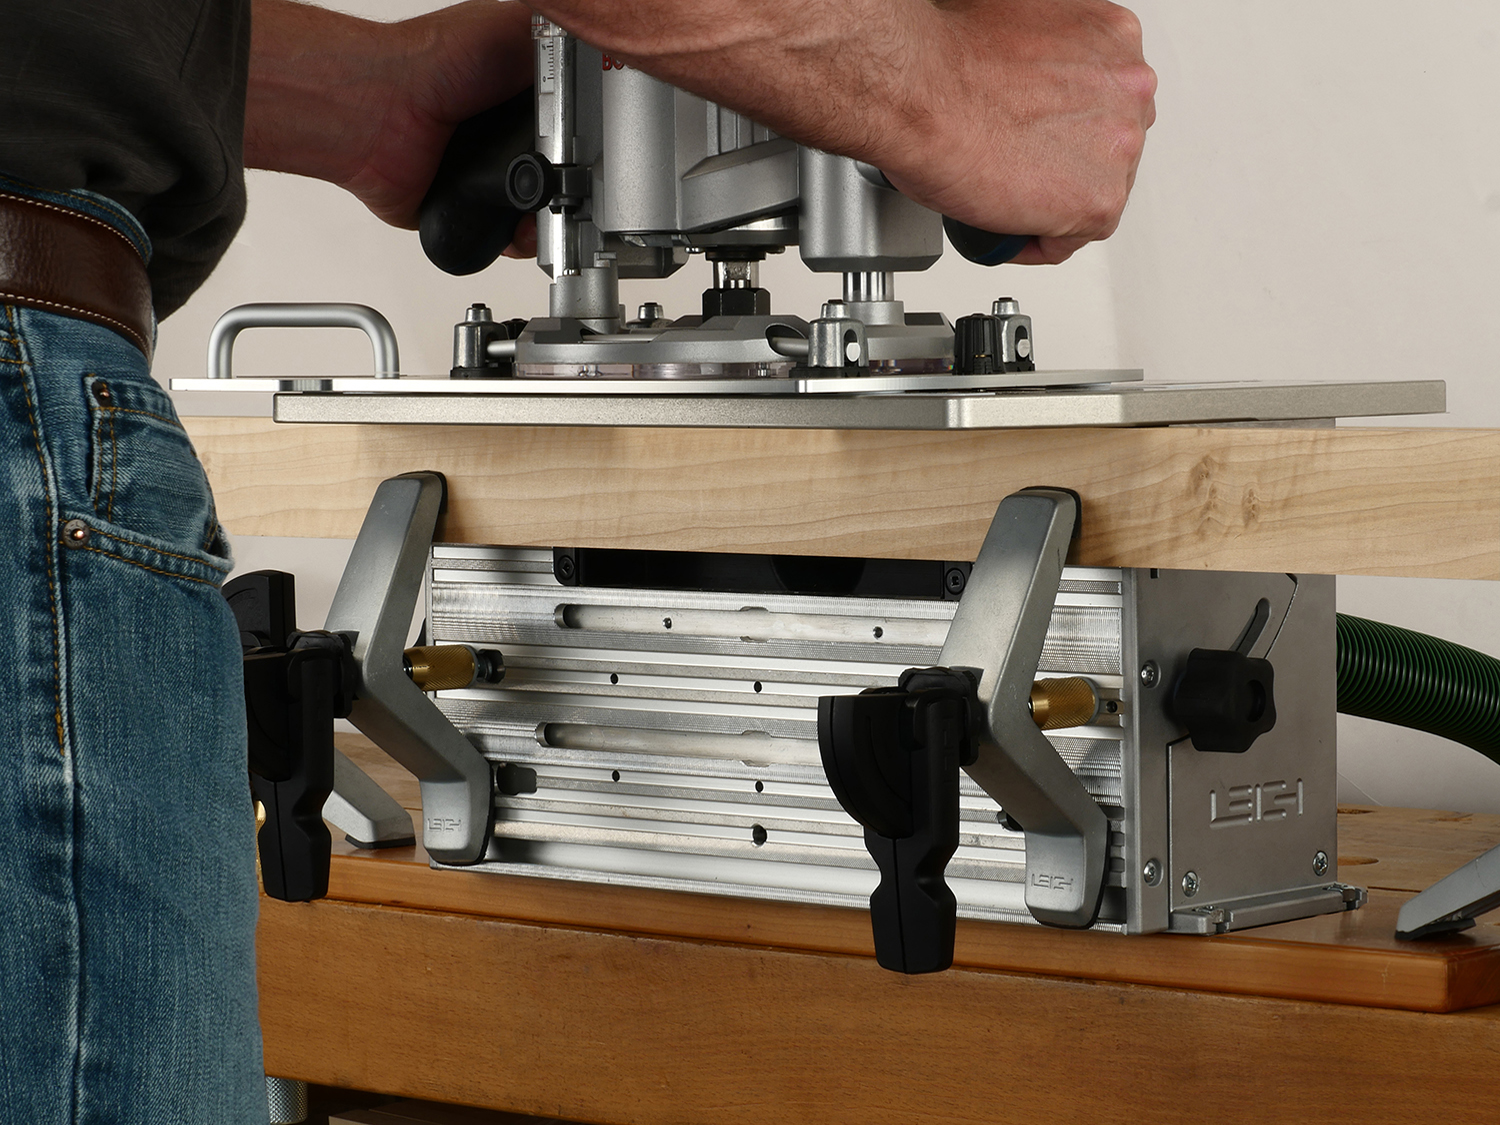
4 Place the router/sub-base on the table in position, ready to rout around the joint guide.
Note: Additional tenon boards may be routed without having to mark and sight the tenons.
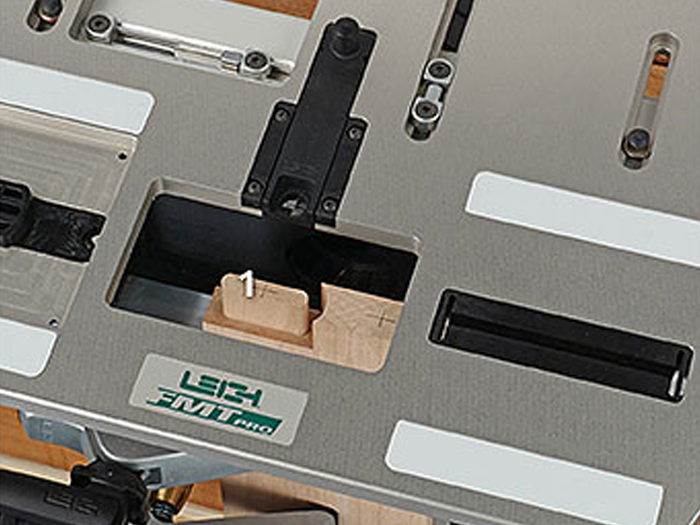
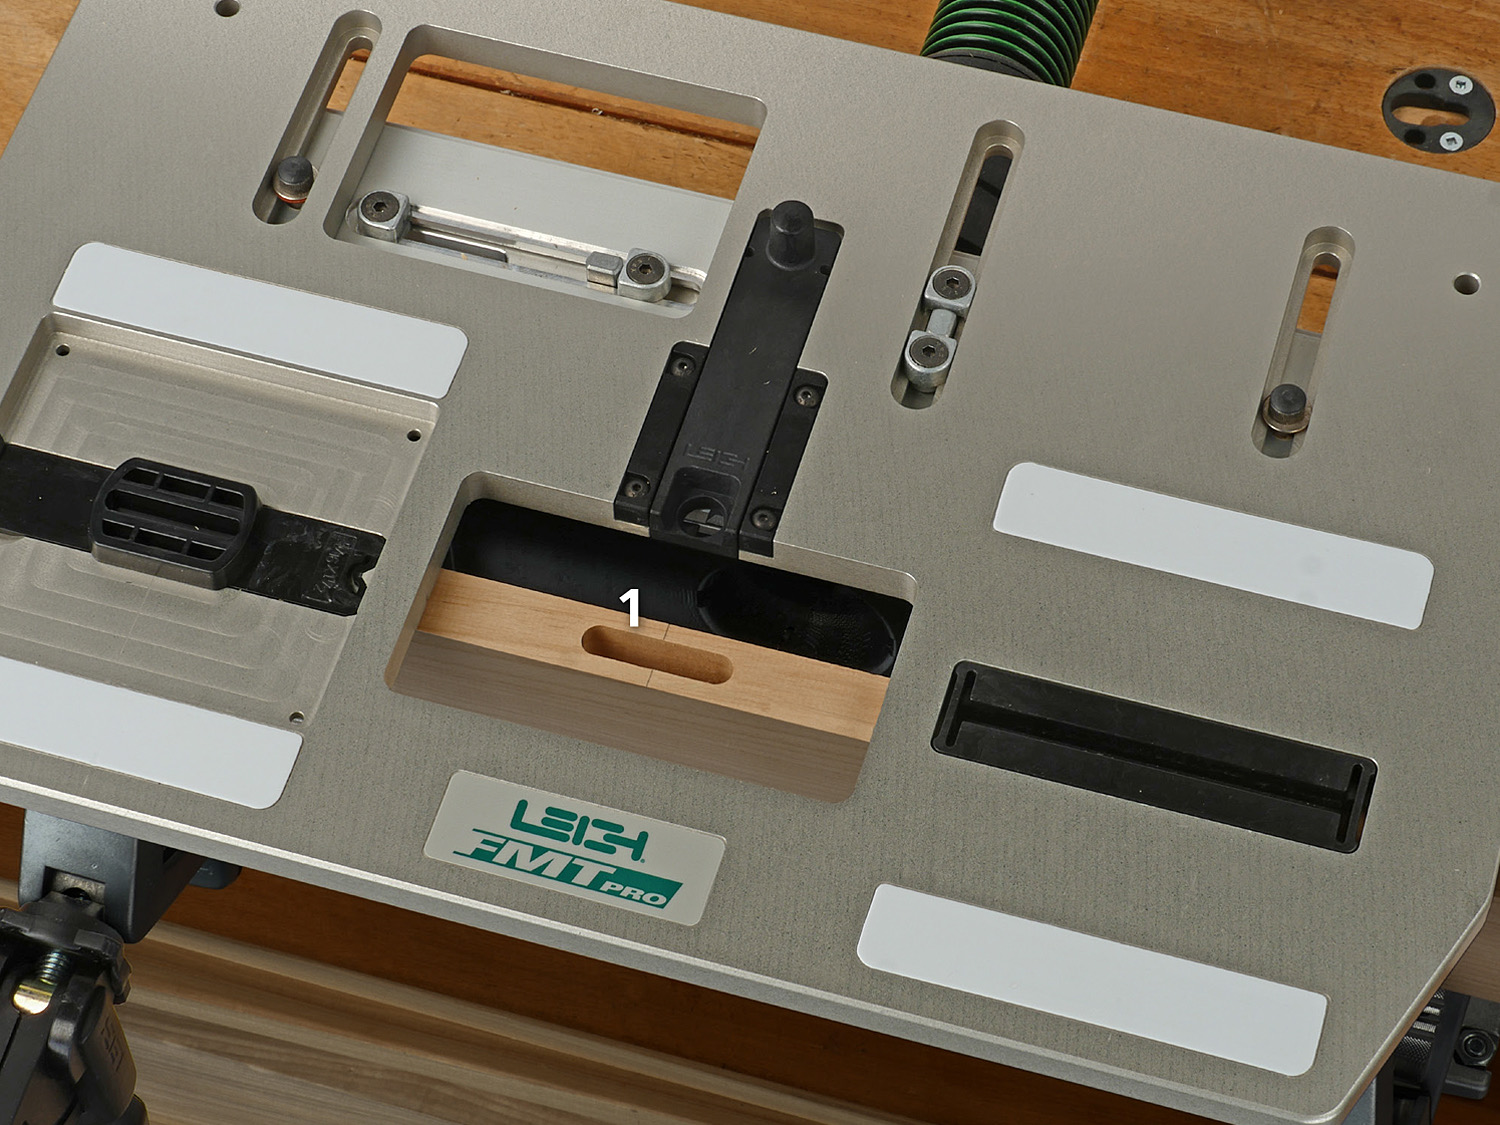
5 First, rout the left tenon (1).
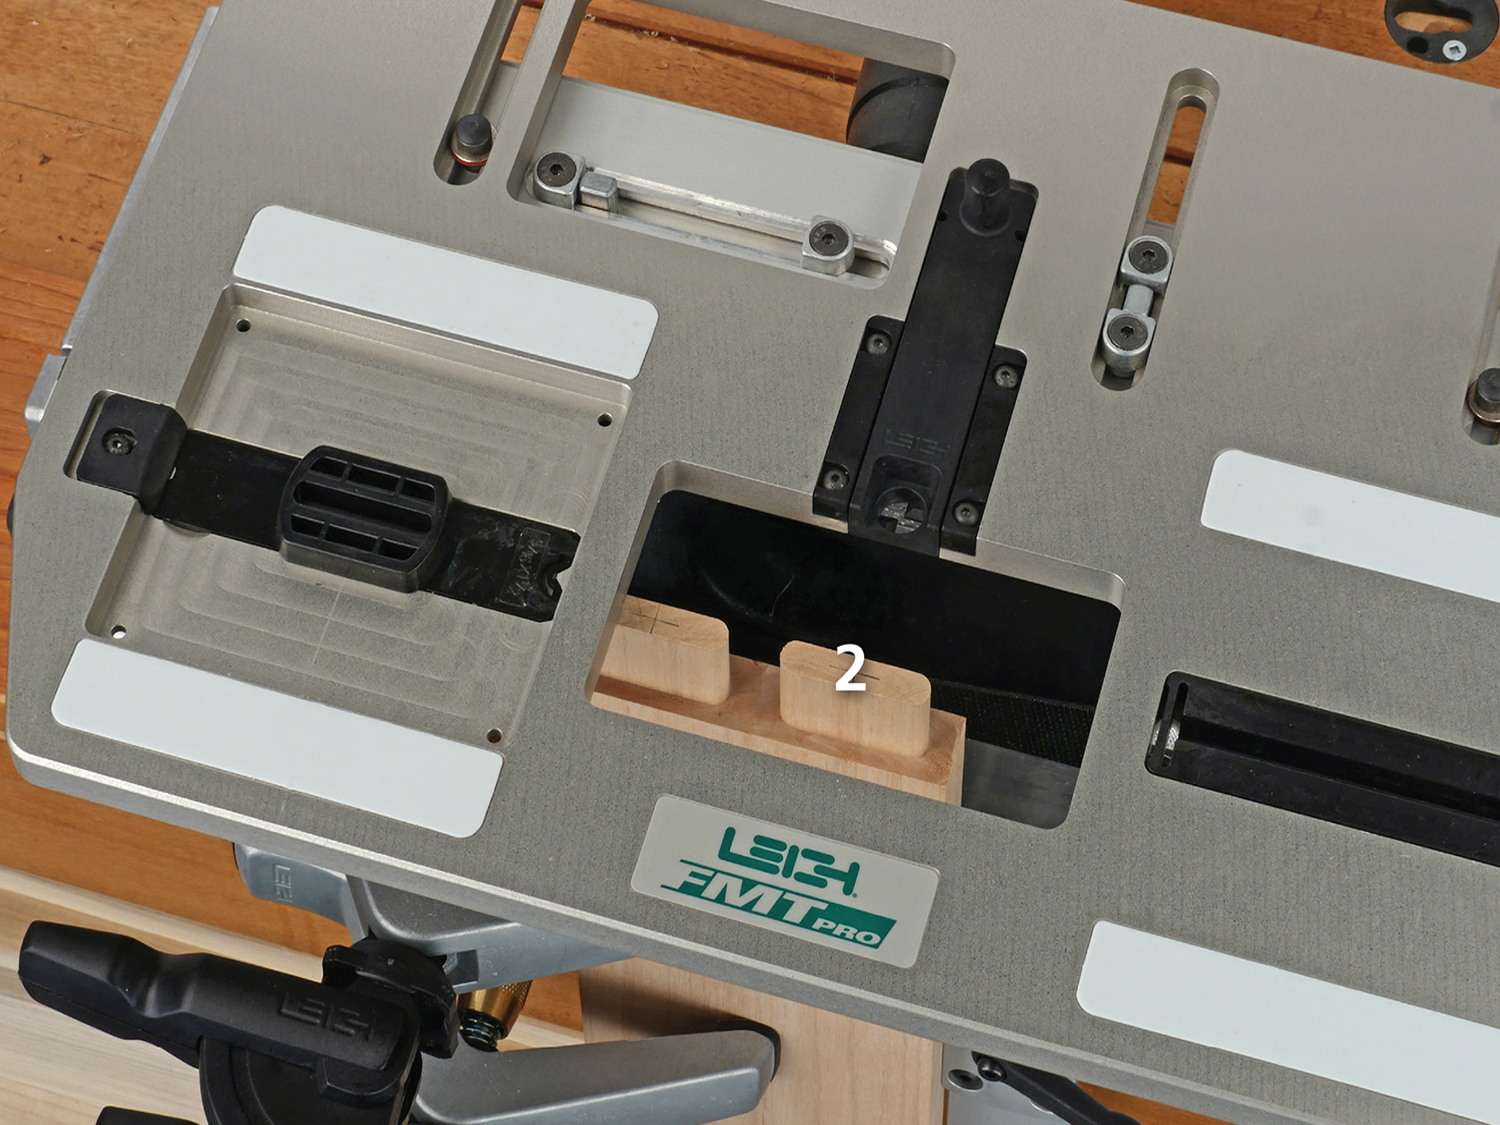
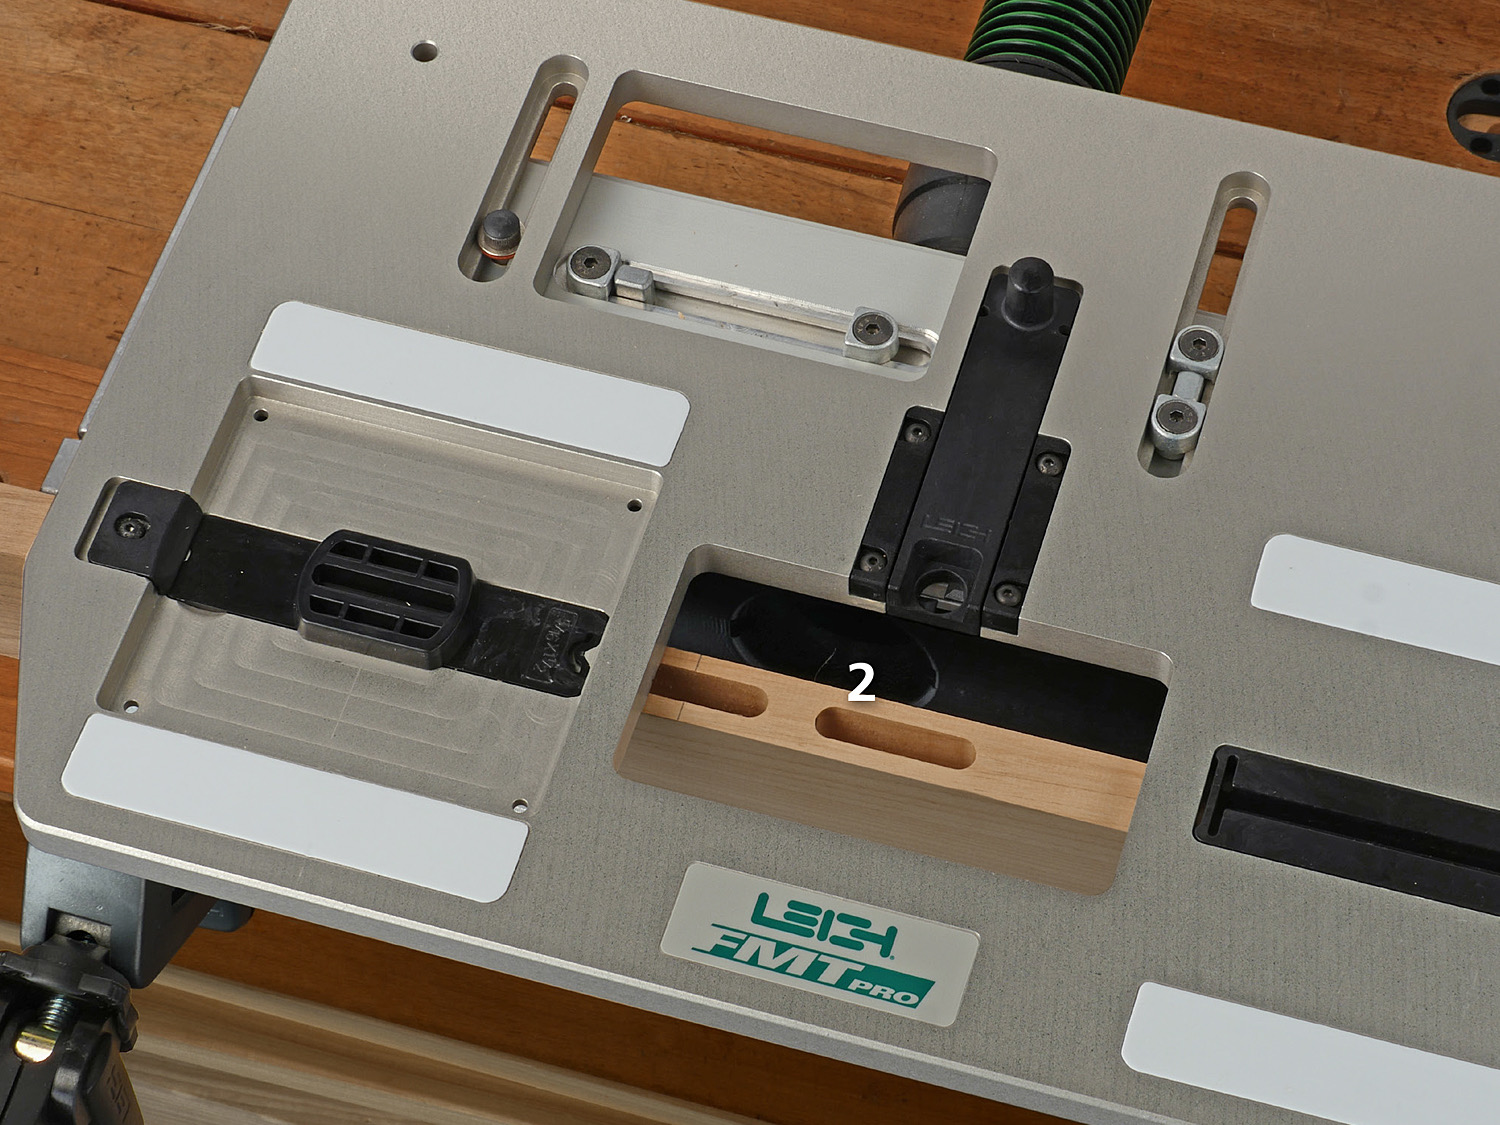
6 Move table to the right and rout the right tenon (2).
1 Remove the tenon and router. Extend the sight, align the mark, and clamp the mortise board to the jig.
2 Place the router/sub-base on the jig table, ready for routing.
3 Rout the left mortise (1).
4 Rout the right mortise (2) in its respective table position, as set earlier by the table limit stops that allow for precise repeatable positioning of the table. You’re now ready to join the routed mortises and tenons together.